
Last updated on June 15th, 2025 at 11:03 am
Today, we’re diving in one more cast on method – Double-Start Cast-On, also known as the Latvian, German, or Estonian Double cast on.
Why you would want to learn this cast on technique?
It is stretchy and looks pretty too! It is easier stretchy cast on method compared to Jeny’s slipknot cast on. If you know Long-tail cast on – this is a variation of it.
(If you don’t know Long tail cast on, I would advise to follow the link and learn it first!)
Perfect match for certain knitting patterns like 1 x 1 and 2 x 2 ribbing. It wraps snugly around the bottom of the ribbing columns, creating a neat look.
And guess what? If you’re into making socks, hats, gloves, the Double-Start Cast-On is like a magic trick for them. If your knitting needs to be comfy and flexible, and this technique ensures just that.
Ok, got clear with WHY question. Now let’s move to HOW!
Double start cast on knitting picture guide
If you knit flat, then calculate the desired amount of stitches and add 2 edge stitches.
If you are working in the round, when joining, drop the slip knot or if you are using a knotless start, knit it together with the next stitch.
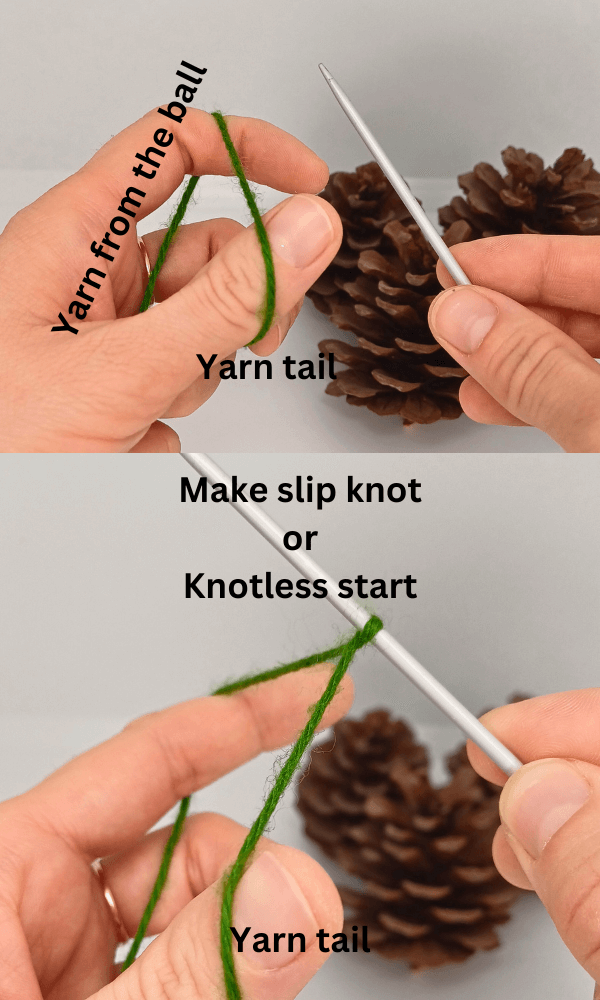
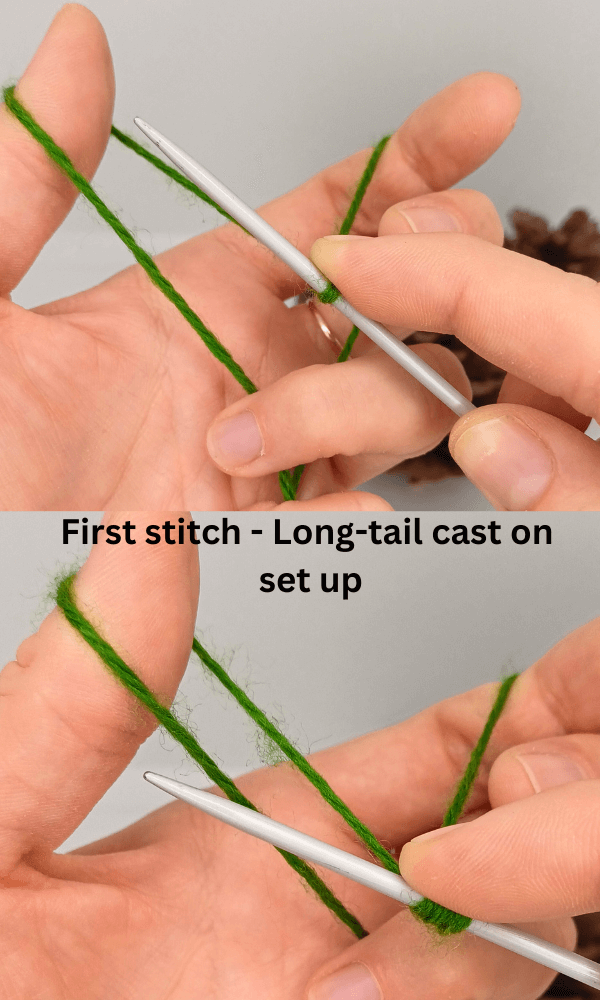
The set up and first cast on stitch for Double start cast on is the same as Long tail cast on.
The tail goes over thumb and the working yarn goes over index finger.
Knotless start. Make a loop around the needle by inserting it under the strand between the thumb from left to the right and index finger and turning the strand clockwise.
First actual stitch – same as in Long tail cast on!
Move the knitting needle down and under the closest strand you see as you look straight (outer strand around the thumb).
Lift up the needle and scoop the closest yarn around the index finger. Go back through the hole around the thumb.
You will see a new cast on stitch is on the needle already, you just have to pass it back through the hole. Release the thumb from the loop.
Second cast on stitch
The difference occurs as you maintain hand positioning, but shift your left thumb away from the yarn strands. Subsequently, wrap your left thumb around the yarn from the opposite direction.
We then move the knitting needle down between the thumb and index finger, lifting the strand near the palm (which runs from behind the thumb to the remaining three fingers).
Following this, guide the needle over the strand around the index finger, return it through the loop on the thumb, and release the loop. Reset your thumb to the long-tail cast-on position and snugly secure the stitch. Repeat these two cast on stitches.

As you can see, Double cast on snuggles around 2 stitches. It looks great on 1 by 1 ribbing too.
Short Video Demonstration
Curious to see the Double Cast-On method in action? Watch a short YouTube video where I am showing it! And don’t forget to subscribe if you find it useful!
In conclusion, mastering the Double-Start Cast-On technique opens up a world of possibilities in your knitting journey. But guess what? There are more cool tricks to discover!
Check out these other awesome cast-on methods to expand your knitting skills:
Each method brings its own flair to the craft, so go ahead and explore. Happy knitting!