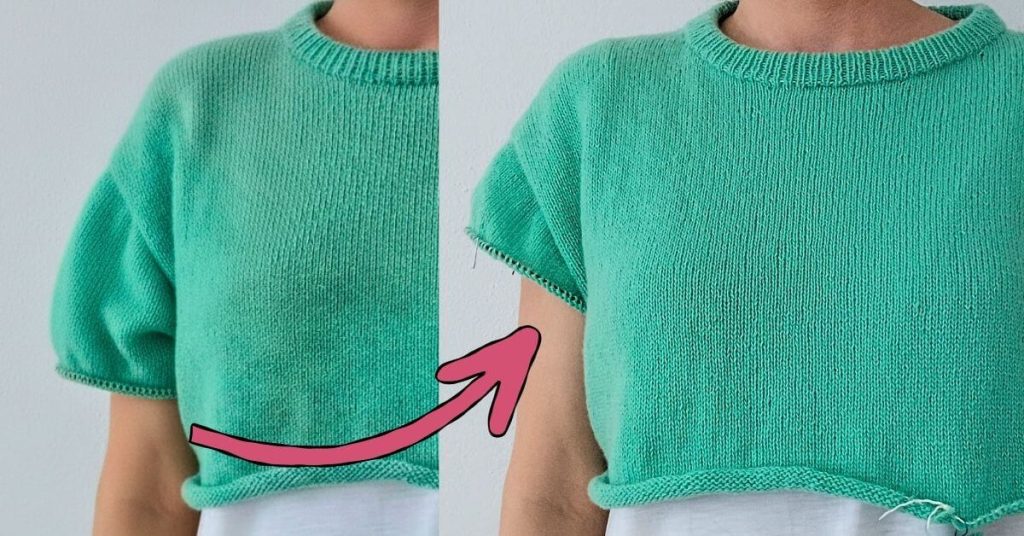
Many knitters believe that simply picking up stitches and knitting straight out from the armhole is the easiest path, but this often leads to a frustrating fit.
The fabric tends to pull or “hinge” downward as a person wears it when a sleeve lacks proper shaping. This lack of structure creates extra bulk at the underarms, which can feel restrictive and result in an unflattering silhouette.
To fix this, you need a sleeve cap. Think of this as a “shaping triangle” of extra fabric placed strategically at the top of the shoulder.
By using German Short Rows, we “sculpt” this triangle so the sleeve mimics the natural curve of your body. Here is my step-by-step guide to doing it perfectly every time.
Knit a Sleeve Cap Video Tutorial
If you’re a visual learner, I’ve filmed the entire process. You can see exactly how I measure the shoulder drop and watch the German Short Row technique in real-time.
Feel free to watch the full tutorial first, then use the written guide below as your step-by-step checklist!
Step 1: Measure the “Shoulder Drop”
Before we knit, we must find the height of our “shaping triangle.” We call this the shoulder drop.
The Pencil Method
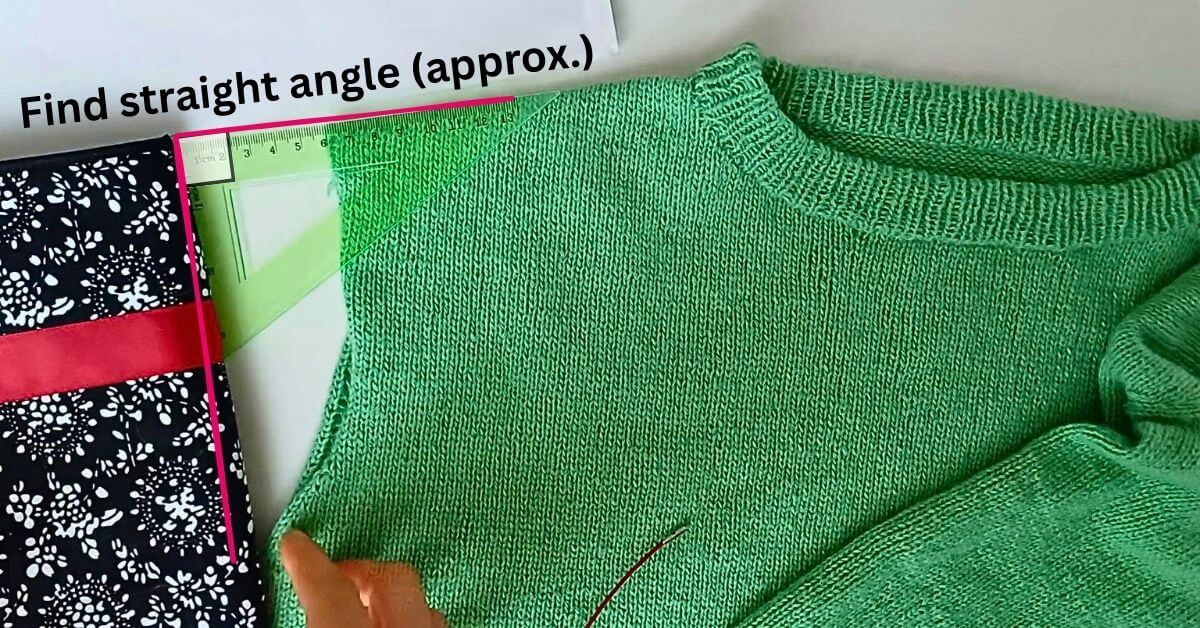
This is the easiest way to see the “straight angle” of your armhole:
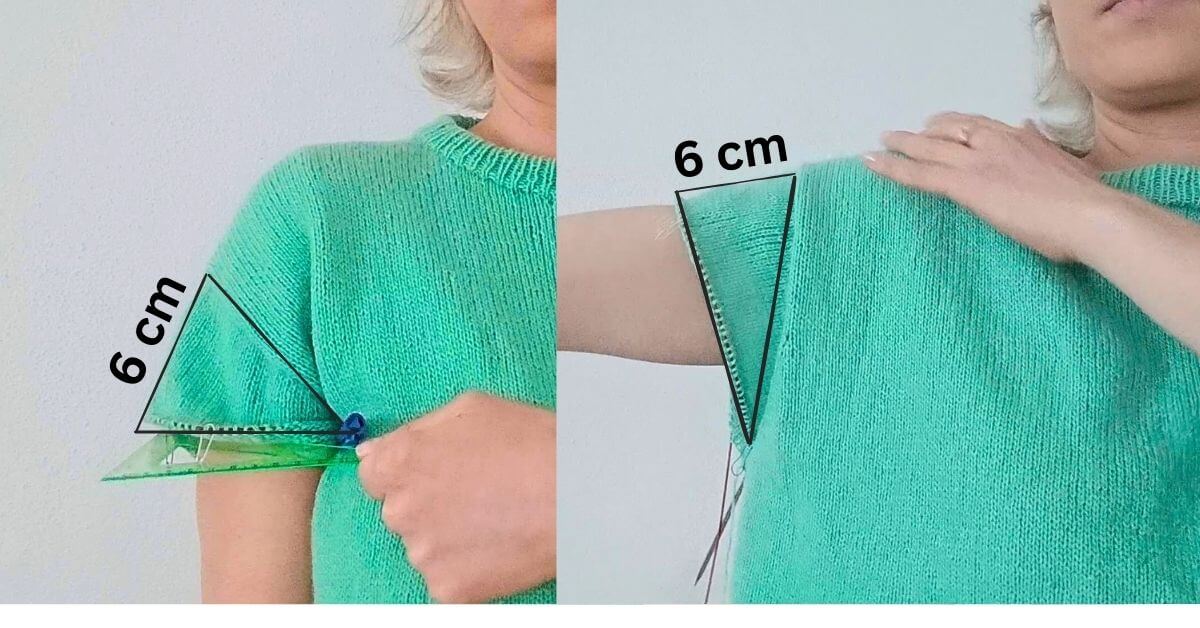
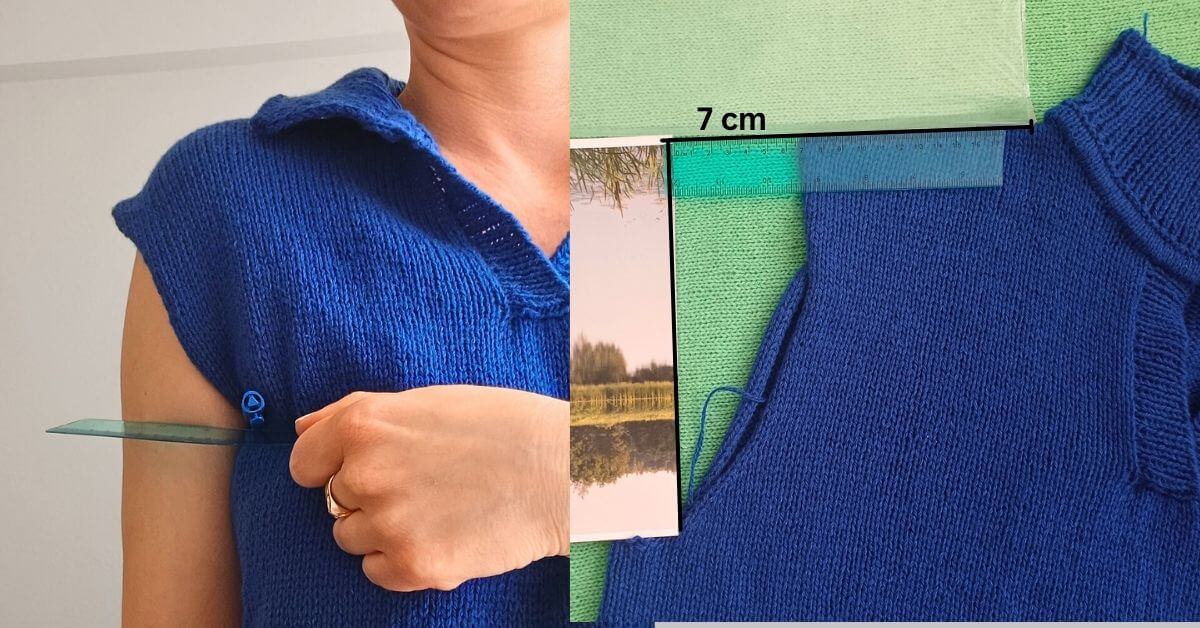
The Setup: Grab a pencil and tuck it horizontally under your arm, right into the armpit.
Measure the vertical sleeve cap height by calculating the straight distance from the shoulder slope down to that horizontal pencil line.
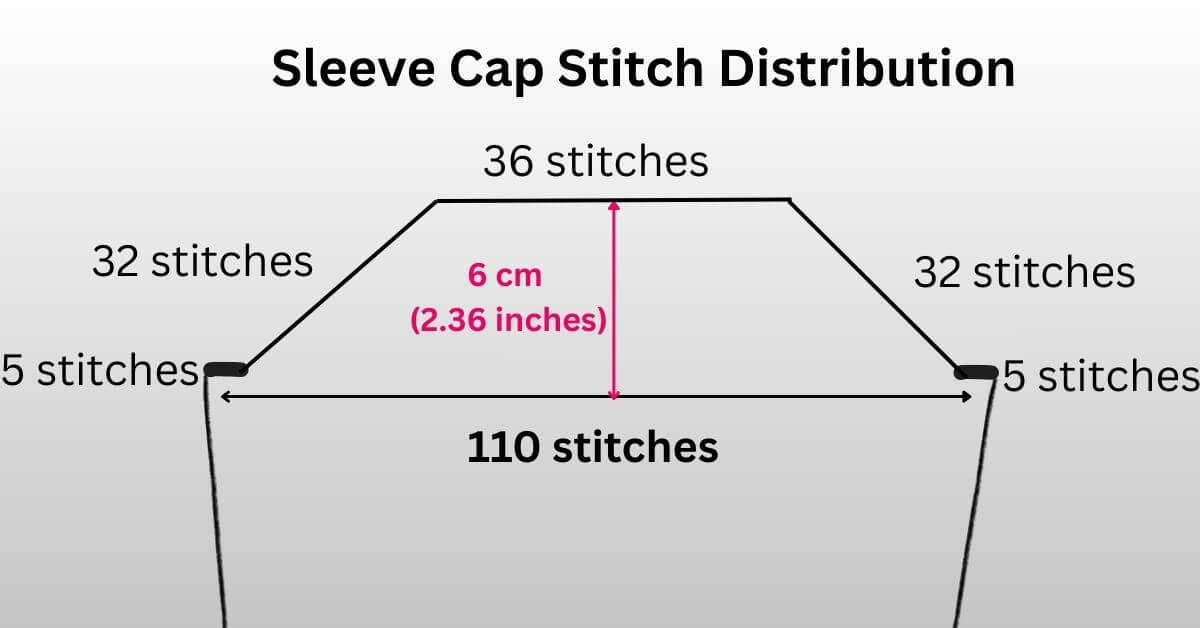
The Result: In my project, this distance is 6 cm. This 6 cm represents the “hill” we need to build with our short rows.
Step 2: Picking Up Stitches
Now we need to get our stitches onto the needles. We want the sleeve to be proportional—not flared like a bell or so tight it pulls.
Stitch Pickup Ratio
My gauge is 26 stitches and 40 rows per 10 cm. To find my ratio, I divide stitches by rows: 26 \ 40 = 0.65. This is almost exactly a 2:3 ratio.
Knit into row 1, knit into row 2, and then skip over row 3 completely. This keeps the fabric flat.
Pro Tips for a Clean Edge
Needle Size: I sometimes use a needle one size smaller than my main one to keep the edge tight, though you can use your main needles for this too.
Placement: Don’t pick straight form the edge stitch. Move half a stitch inward (into the “V”) to create a clean line.
The Underarm: For the flat bit at the bottom, pick up 1 stitch for every 1 bound-off stitch. I picked up 10 stitches here.
Step 3: The Short Row Math
This is where most knitters get confused. Let’s break the math down into three simple numbers.
Total Rows: Multiply your 6 cm height by your row gauge. 6 cm * 4 rows = 24 total rows.
Turning Points: Since each turn creates two rows, divide by two. 24 \ 2 = 12 turning points per side.
The Flat Top: To avoid a pointy shoulder, identify the center third of your stitches to stay flat. Because my sweater has a “fully fashioned” curved shoulder seam, I chose a wide flat top of 36 stitches.
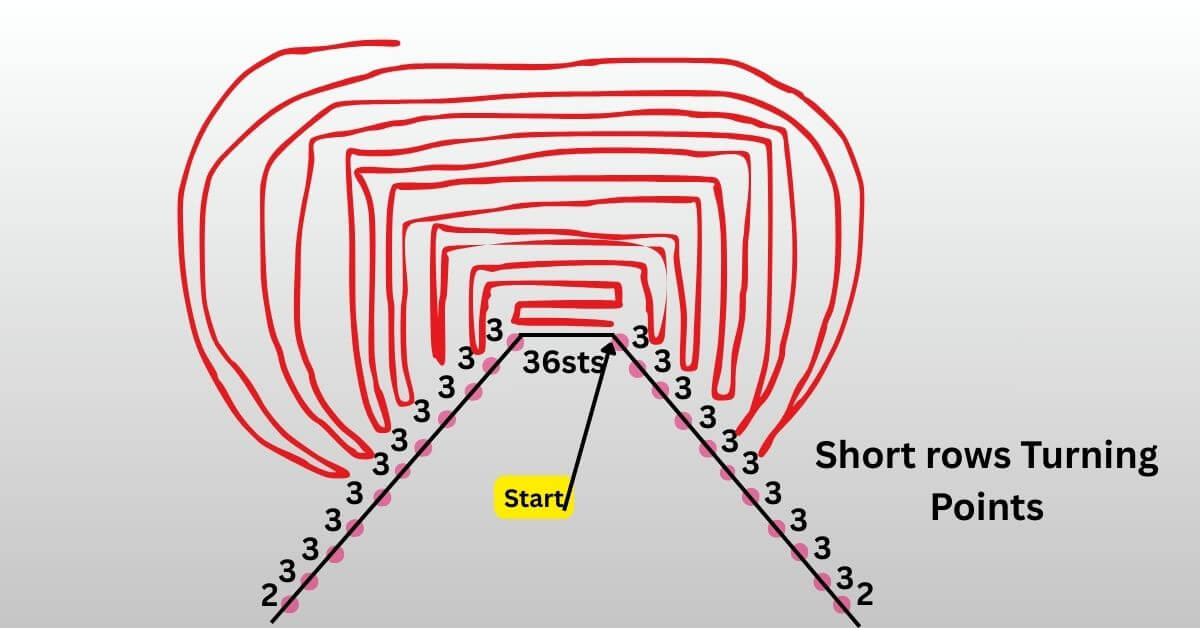
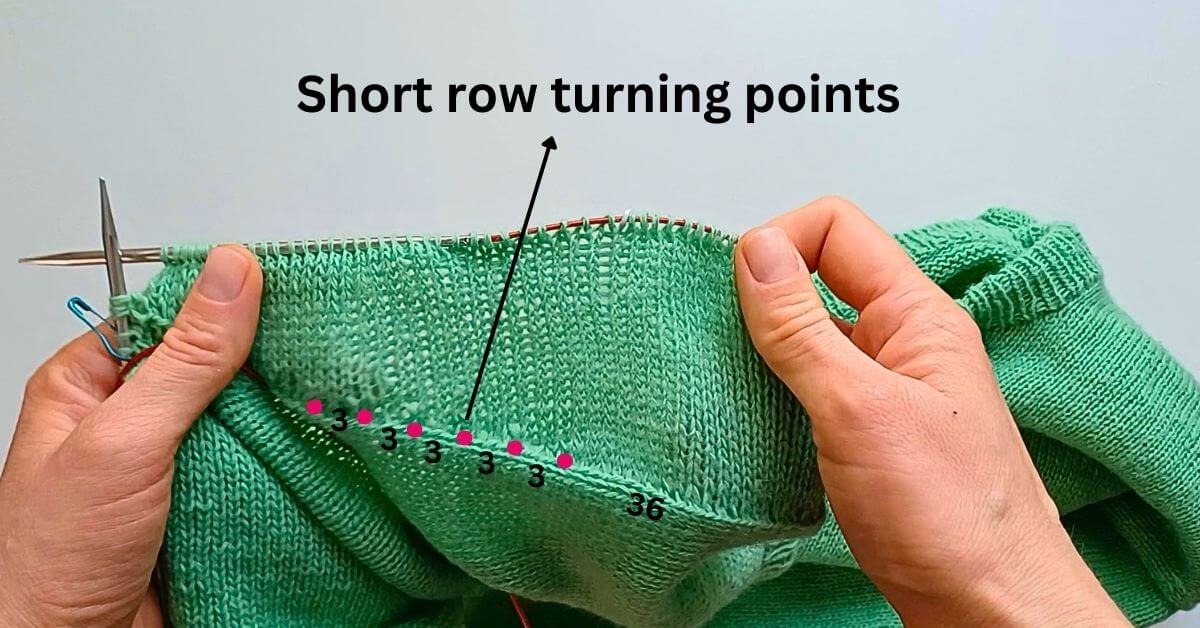
I have 32 stitches left on each side to include in my 12 turns. 32 \12 = 2.6. Since we can’t knit half-stitches, we round up to 3 stitches per turn. Your turning sequence will look like this:
Rows 1–2: Knit across 36 stitches, turn, make double stitch, purl , turn
Rows 3-10: Include 3 additional stitches each time
Rows 11-12 (Last turns): Include the remaining 2 stitches.
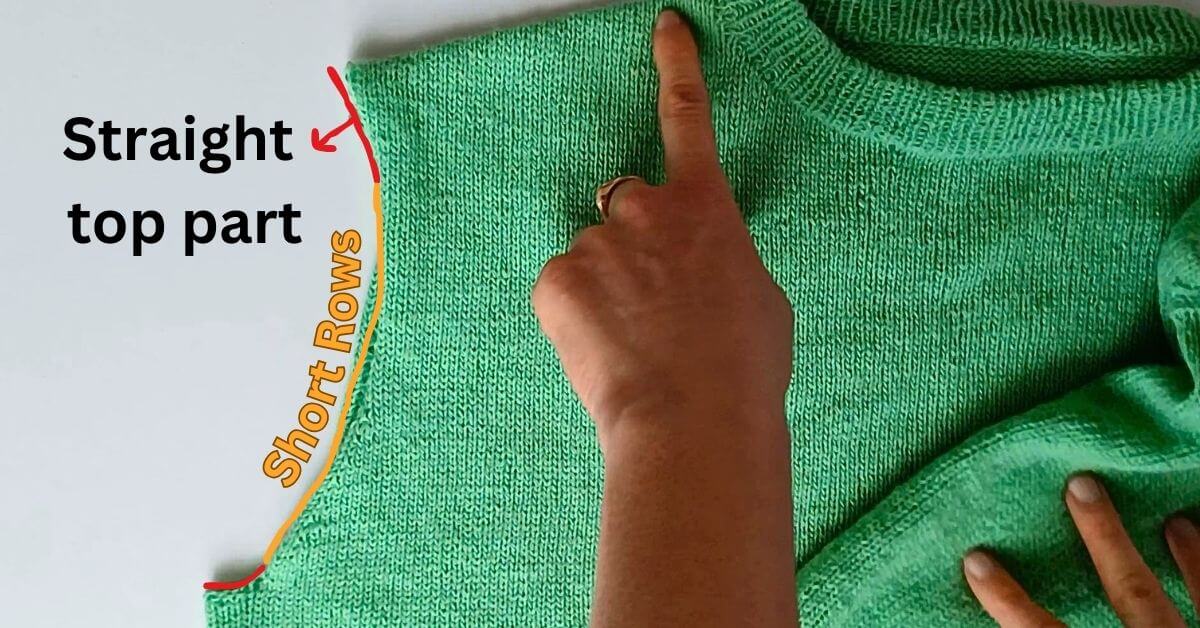
In this example: As you can see from the image above, this is a fully fashioned shoulder line sweater and the sleeve top part is already slightly curved, and I don’t want to make short rows there, so I leave this part as flat area. Based on the total stitch count and the width of the sweater, 36 stitches were used for this center section. These stitches are worked across once before the short row turns begin on either side.
Step 4: Knitting the Cap (Step-by-Step)
Now, we simply execute the math using German Short Rows.
The Foundation Row (RS): Knit across your 36 “flat top” stitches. Turn your work.
The Double Stitch: Slip the first stitch purl-wise with yarn in front, then pull the yarn over the needle to the back until the stitch “rolls” into a double stitch.
Expanding the Triangle: Purl back across the center, work the double stitch, purl 3 more stitches, and turn.
Knit back, work the double stitch (treating the two legs as one single loop), knit 3 more stitches, and turn.
Repeat: Continue adding 3 stitches at the end of every row until you have completed all 12 turns on each side.
Step 5: Finishing & Tapering
Once your 12 turns are done, the “triangle” is finished and the underarm bulk is gone!
Join in the Round: Move your marker to the center of the underarm.
The Underarm Gusset: To close the gap quickly, decrease 1 stitch at each side of the underarm every second row (10 stitches total).
The Taper: For the rest of the arm, do a gradual decrease of 2 stitches every 10th row down to the wrist.
The Final Result
By following this geometry, your sleeve will sit perfectly in the armhole without pulling. While “fitted sleeves” require a different calculation, this top-down method is my go-to for professional-looking sweaters that actually fit!
Troubleshooting: Common Sleeve Cap “Oops” Moments
This usually happens if the German Short double stitch wasn’t pulled tight enough. When you pull the yarn over the needle to “roll” the stitch, give it a firm tug. If you already have a hole, don’t worry—you can use a matching piece of yarn and a tapestry needle to “duplicate stitch” over the gap on the inside of the garment once you’re finished. Or, read how to avoid underarm gaps.
This happens if your “Flat Top” section was too narrow. For your next project, make sure to use approximately the center third of your stitches as the flat starting zone.
Next time, try picking up 2–4 extra stitches at the very “corners” of the armpit (where the flat underarm meets the vertical sides). This adds a tiny bit of “ease” and prevents the fabric from straining when you lift your arm.