Last updated on July 6th, 2024 at 12:42 pm
We all have been at the beginning of our knitting journey and making common knitting mistakes. Although I am knitting for many years, sometimes I still end up doing them. I want to share with you knitting mistakes and how to avoid them.
1. Not enough yarn to finish a project
I rarely knit from ready knitting patterns, and I try to design my garments myself. Therefore, I still can’t predict the exact amount of yarn to finish a project. Wouldn’t be an issue if I could buy more yarn, but there is no more yarn in the shop. I want to show you half ready work in process, and I can’t finish them for months now! And that makes me quite upset because I really would enjoy a finished piece.

Solution
Don’t change your initial idea drastically for the knitting project and always buy an extra skein (or 2) of yarn. Even if there is more yarn in the store, the same color of yarn might have a slightly different shade if it comes from a different batch.
Tip!
Stockinette and lace knitting eats up less yarn.
Arans and cables are yarn eaters.
2. Raglan sweater neckline shaping
For many years I knitted only garments with back and front and set-in sleeves. There was no issue with neck shaping because it came up naturally. The tricky part came in top-down raglan sweaters. On the pictures bellow are my first top-down raglan sweaters. I studied all the calculations, but 1 thing I didn’t get right is nicely shaped neckline. I knitted short row back neckline but didn’t continue short rows into the front neckline and continued knitting in the round which left me with a straight front neckline.
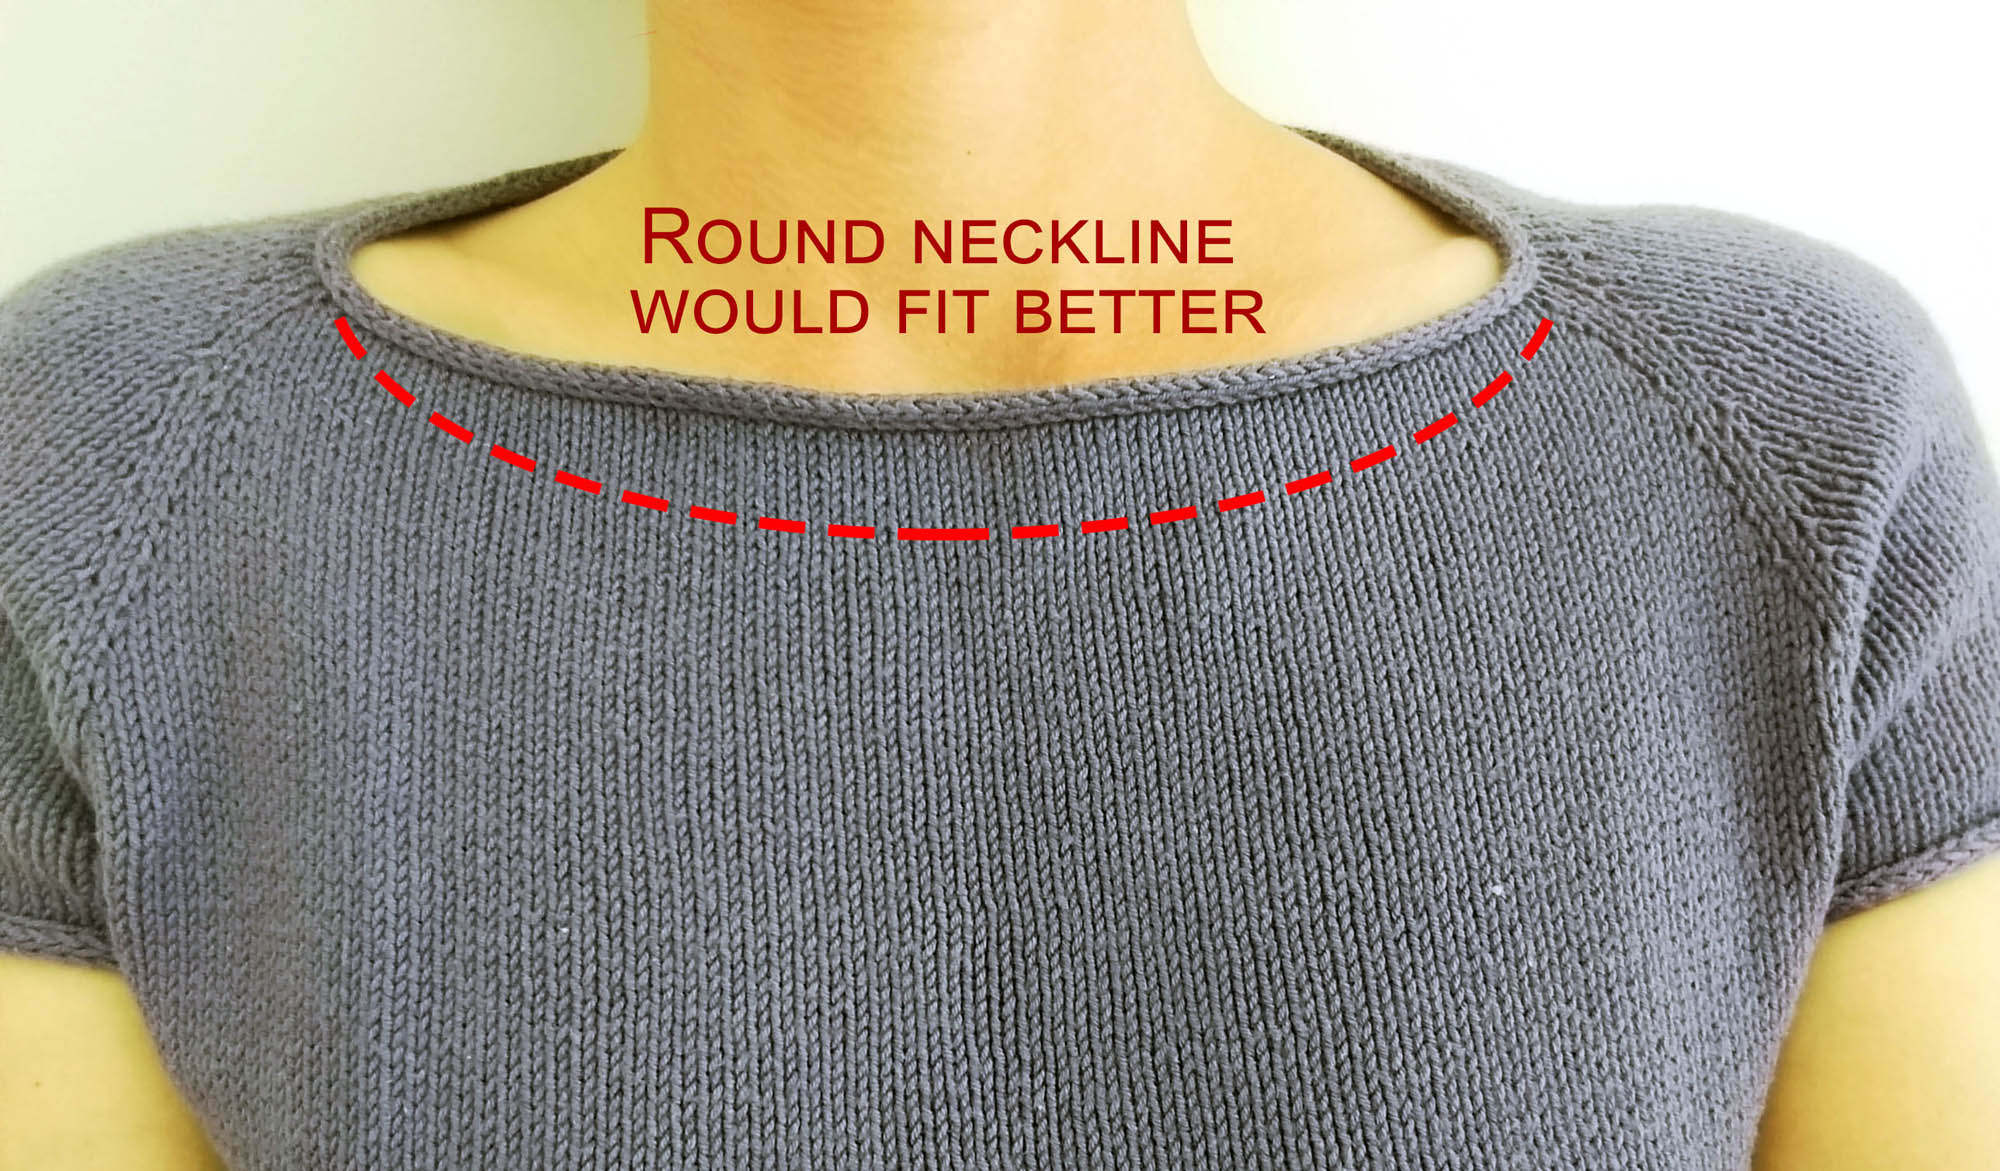
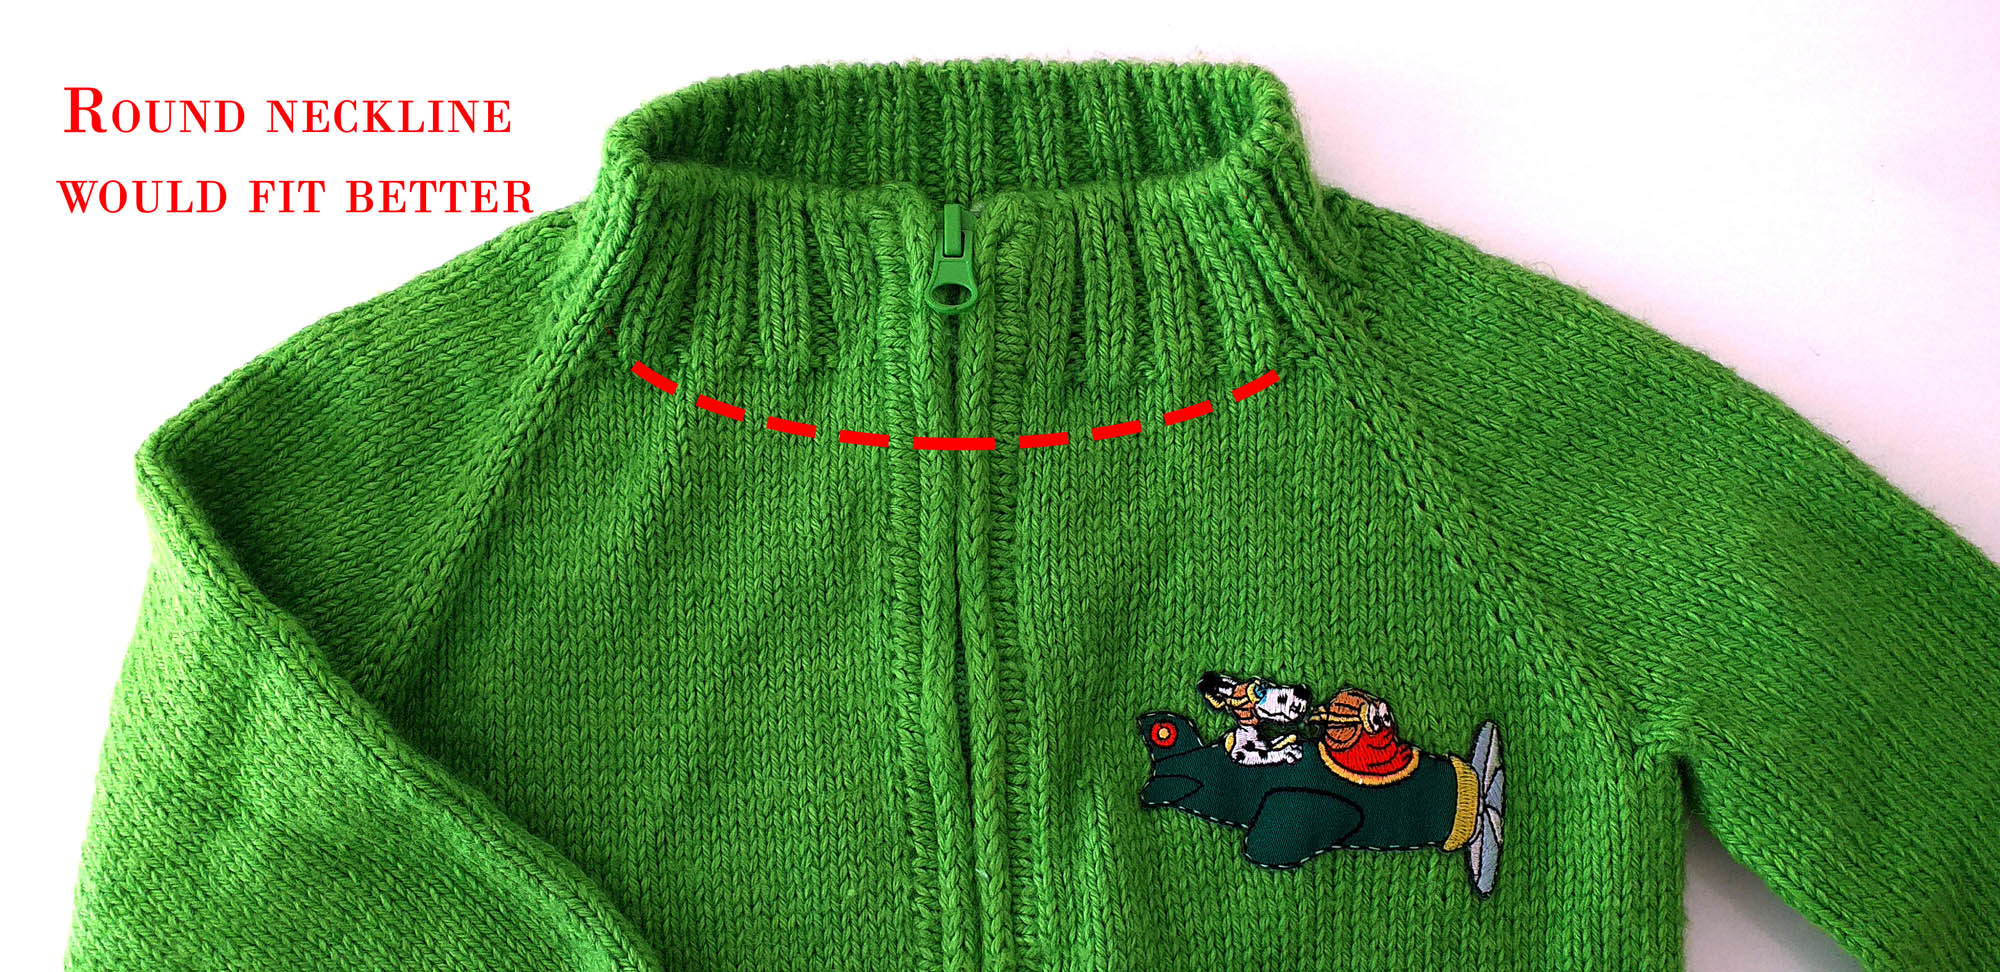
Solution
Learn short rows neckline shaping.
From these common knitting mistakes, I learned to do my math proper even if it takes more time to calculate correct neckline shaping.
Tip!
Don’t hesitate to knit small examples to understand the shaping. I started with a cardigan for my son. If you have to unravel it doesn’t hurt much.
3. Synthetic yarn vs. natural fiber yarn
When I just started my knitting journey many years ago, I didn’t pay attention, whether the fiber is synthetical or natural. I was knitting 100% acrylic yarn, and I was happy. The attraction to bright colors and appearance. I made the same mistake recently. The biggest drawback is the yarn pilling. Acrylic, polyester, nylon, and wool yarns are more prone to pilling than cotton, linen or silk. The difference:
- The synthetical shed is difficult to remove
- The shed from wool is easy to remove

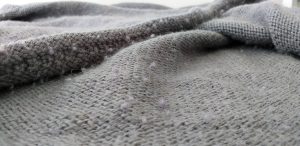
Solution
If you use synthetical yarn, then your choice should be anti-pilling yarn. Get rid of the shed in wool material by using sweater shaver or brush. The natural wool garment should look like new.
4. Swatch tension vs. ready garment tension
With experience, I found out that my swatch tension is looser than garment tension. I didn’t end up with garment being too small, because I set enough positive ease, but it certainly would come up exactly in size as I had in my mind. Here are an example of swatch and ready garment look.
Solution
Always, always knit a swatch and test it. Usually, we don’t care about swatch quality much, and we are knitting more relaxed. Or, opposite around. Whichever way, consider it when calculating ready garment fit.
Tip!
If you plan knitting in the round, your swatch also should be knitted in the round. Knitting in the round tension might be tighter than right and wrong side knitting. Especially knitting in the round stockinette. It is nothing to do with how you connect in the round. It is because the knit stitch is tighter than a purl stitch.
5. Understanding garment ease knitting
In my early days common knitting mistake was that I just measured up my bust, waist, and hips and used these measurements without thinking that I will get a tight fit. It is called zero ease. A knitted garment with zero ease doesn’t look good at all, especially if you put a few kilos on it might not fit anymore. The knitted piece should have air and space between the body and the garment itself. That is an ease.
Solution
Measure a sweater or cardigan that already fit you properly and use these measurements. If you want to design your garment, here are general rules for ease.
| Measurements | Wearing Ease | ||
| Close fitted | Semi-fitted | Loose fitting | |
| Half- bust | 1,18” – 1,57” (3-4cm) | 1,57” – 1,96” (4-5cm) | 1,96” – 2,36” (5-6 cm) |
| Half-waist | 0,59” – 0,78” (1.5-2 cm) | 0,78” – 1,18” (2-3cm) | 1,18” – 1,57” (3-4 cm) |
| Half-hip | 0,59” – 0,78”(1.5-2 cm) | 0,78” – 1,18” (2-3cm) | 1,18” – 1,57” (3-4 cm) and more |
Tip!
Hats are different! Hats you have to knit with the negative ease, because you want them to sit on your head, not to fall off. The general rule for hat size:
- head circumference minus 0,78” – 1,57” (2-4 cm).
- Or, minus 5% for tight fitting, minus 10% normal fit, minus 15% tight fit over the head.
6. Sewing pieces together with a sewing machine
Let me explain this. I haven’t done this way, but I saw many garments sewed together with a sewing machine. Why I don’t recommend sewing pieces together with a sewing machine is the following:
- sewing machine might stretch a seam on garments or make seam not stretchy at all.
- Difficult to get the seam straight;
- Troublesome ripping off the stitch if something goes wrong;
- Different patterns might need different seaming techniques
- Joining different pieces of the garment need different seaming techniques.
Solution
Learn and practice following seaming stitches and your work will always look professional:
- Mattress stitch
- Kitchener stitch or grafting
Tip!
There are many videos online, take your piece of knitting and follow along, trying to understand the principle.
7. How To Knit A Swatch For Gauge
- Gauge swatch must be at least 4″/10cm wide and 4″/10cm tall.
- Don’t block gauge swatch, wash it instead and let it completely dry.
- Lay it on the flat surface and measure.
Tip!
If you want to know how the fabric will behave, you can put it in your handbag and give a test ride for friction for a few days.
If you are using heavyweight yarn like silk or viscose, consider to knit bigger swatch. Swatch for gauge laying it vertically. The ready garment will stretch vertically under its own weight.