I’m exited to share a beginner-friendly tutorial on how to knit a simple, rustic pumpkin with a beautiful horizontal braid, also known as a lateral braid or Vikkel Braid.
This project is perfect for using up leftover sock yarn and creating a unique piece that’s full of character.
Any yarn of your choice (I used plain and colorful leftover sock yarn in 2 strands)
Crochet hook size 3.5 mm (or size compatible with your yarn). I used 3.75 mm Chiaogoo needles this time.
Scissors
Yarn needle (for finishing touches)
Wooden or cinnamon stick
Stuffing material (or bubble wrap)
Knitted Pumpkin with Horizontal Braids
Casting On and Your First Row:
To start, use a knotless long-tail cast-on. For this pumpkin, I cast on 20 stitches , but you can adjust this number to make your pumpkin bigger or smaller.
Next, you’ll work a setup row. Purl the wrong side of the stitches, making sure to slip the first stitch
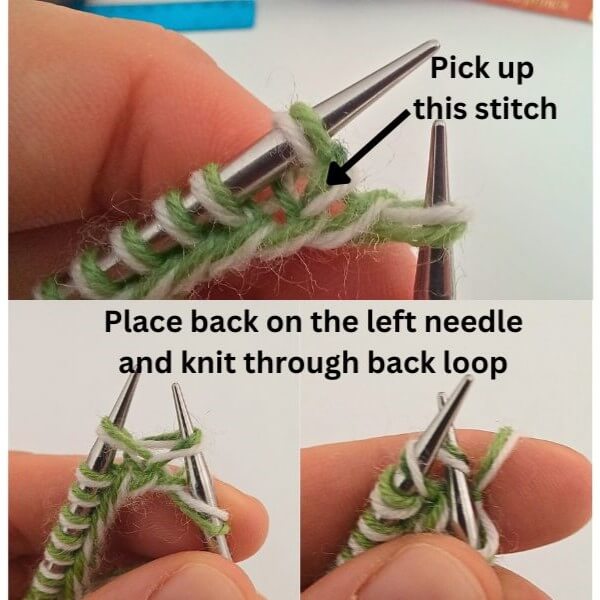
Make a right-leaning increase by picking up the stitch from the row below and knitting it through the back loop. This new stitch will become the braid.
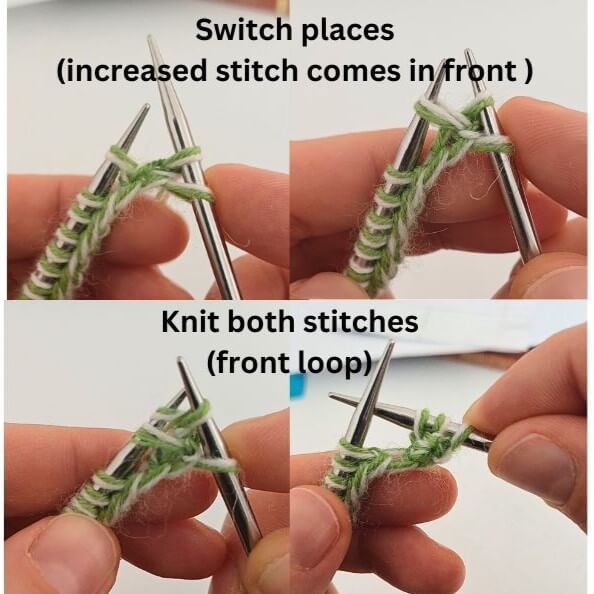
Now, cross the stitches over as you would for a cable, ensuring the increased stitch is in front. Knit both stitches through the front loop.
Continue this process across the row—switching and knitting each pair of stitches.
When you get to the last three stitches, you need to decrease that extra stitch you made. Do this by knitting two stitches together through the back loops.
Purl the last stitch.
Repeating the Pattern
After the braid row, knit three rows of stockinette stitch. That means you’ll purl on the wrong side and knit on the right side.
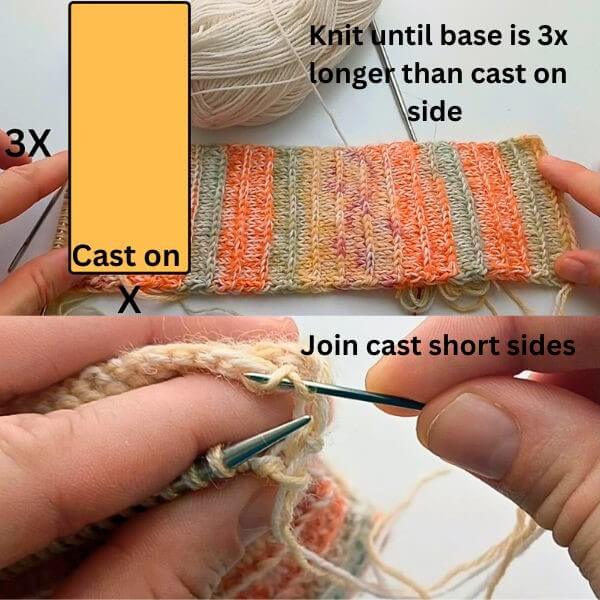
Repeat the braid row every fourth row until your piece is about three times longer than its shortest side.
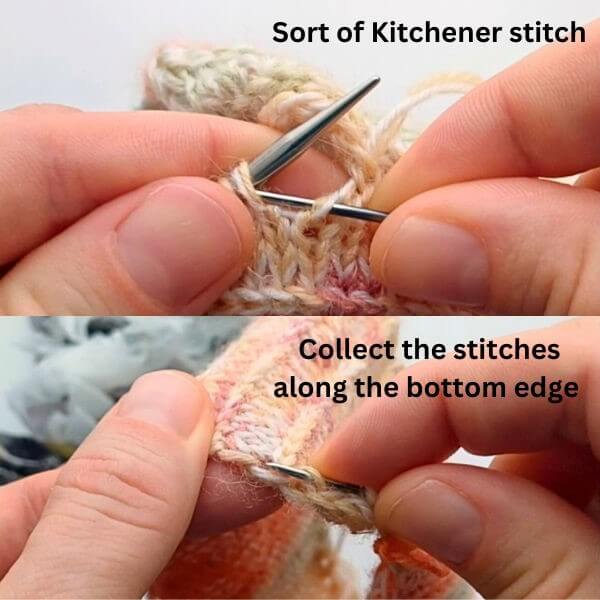
Now for the fun part! It’s time to sew up the sides. I like to use a seam similar to a Kitchener stitch to keep it thin. You’ll join the cast-on stitches with the live stitches on your needle.
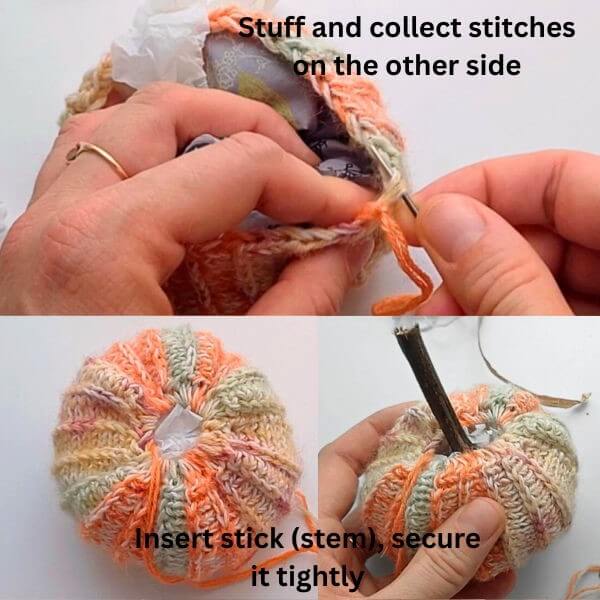
Next, collect the stitches along the bottom edge of your knitted tube. Use a separate thread and go through each side stitch all the way around. Pull it tight to close the hole, then secure it with a crisscross stitch.
Now, stuff your pumpkin! You can use regular stuffing, or get creative with fabric scraps or even plastic bags cut into strips.
Step 5: Finishing Touches
For the stem, you can use a stick or a cinnamon stick. Just place it in the center and secure it with thread.
To create the classic pumpkin wedges, pass yarn along the sides or use a simple running stitch across the side. The number of wedges is totally up to you!
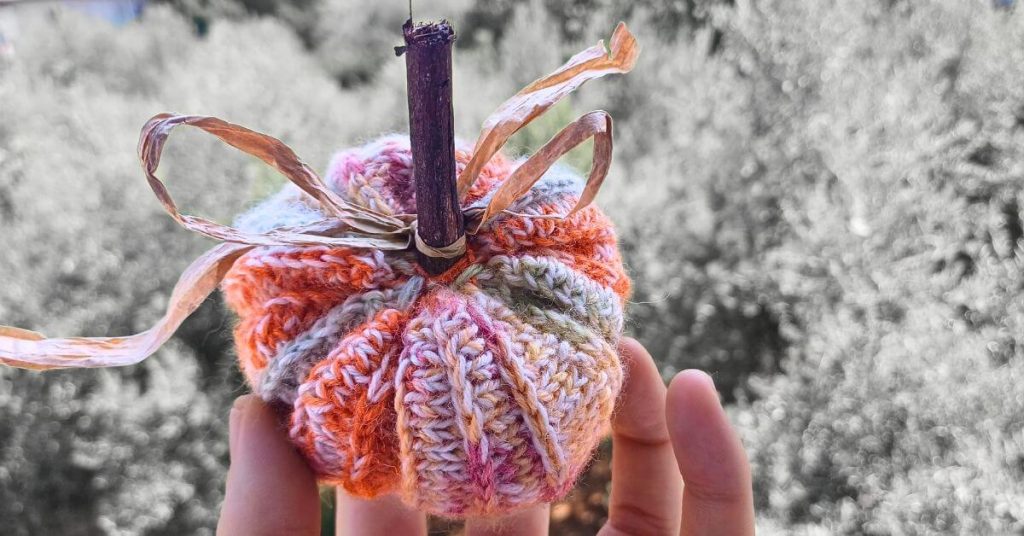
Finally, I added a simple bow with some scrap paper yarn to give it a polished, rustic look.
DIY Knitted Pumpkin Photo Guide
1. Ready base. Maintain 3:1 proportion (in cm or inches)
2. Sew sides, collect the stitches by picking up every side stitch. Tighten up and close the small hole with criss cross stitch.
3. Stuff the pumpking and collect stitches on the other side, insert wooden or cinnamon stick.
4. Ready pumpkin with wedges
And that’s it! Your beautiful knit pumpkin is ready to be displayed. I hope you enjoyed this tutorial. Happy knitting!