Crochet hook size 3.5 mm (or size compatible with your yarn)
Scissors
Yarn needle (for finishing touches)
Wooden or cinnamon stick
Stuffing material (or bubble wrap)
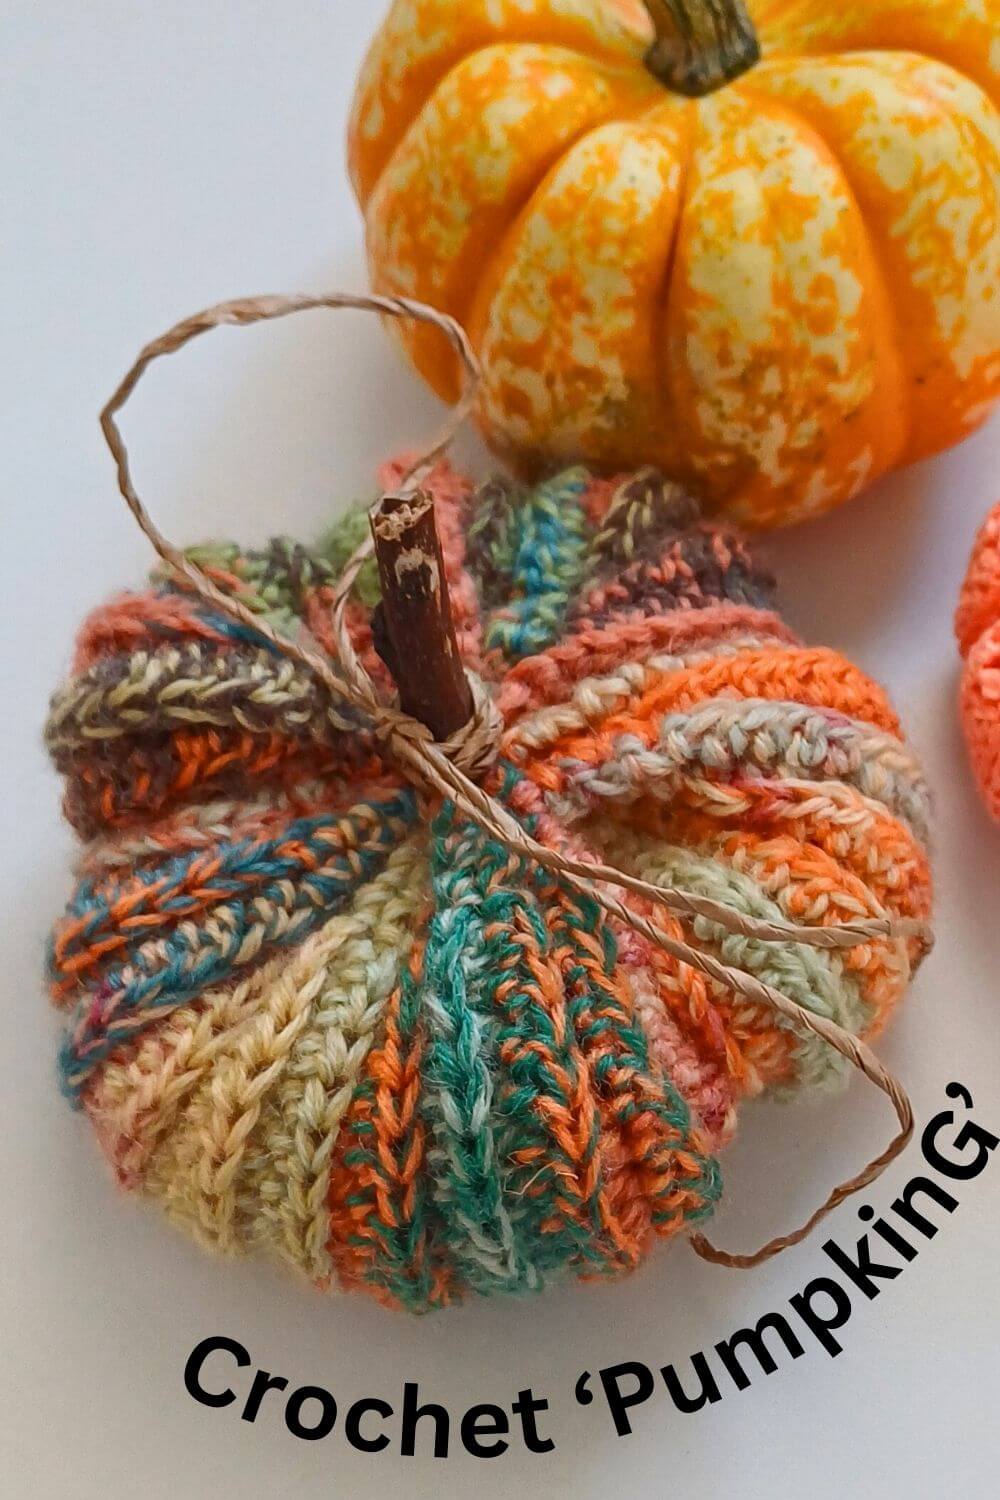
Customize your pumpkin’s size and texture by swapping yarn types and patterns.
Why This Crochet Pumpkin Pattern Works?
This pumpkin pattern uses a universal formula, meaning you can start with any chain length and still get a perfect pumpkin shape! For example, the tutorial starts with a chain of 20 plus one turn stitch (21 stitches total), but this number is flexible according to your preference.
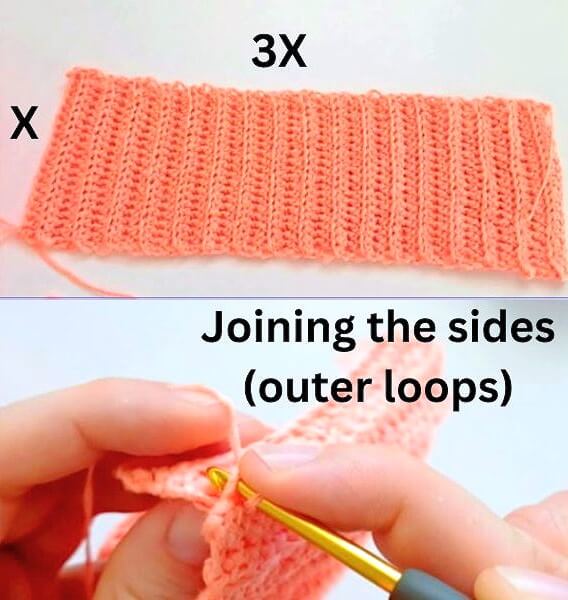
The trick is in maintaining 1:3 proportions, so your pumpkin stretches naturally and evenly regardless of material.
Step-by-Step Instructions to Crochet Ribbed Pumpkin
Create a Foundation Chain Start with any number of chains you want, plus one extra stitch for turning. The example uses 20 + 1 = 21 chains.
Row 1: Half double crochet across Work one half double crochet (hdc) into each chain starting from the second chain from the hook.
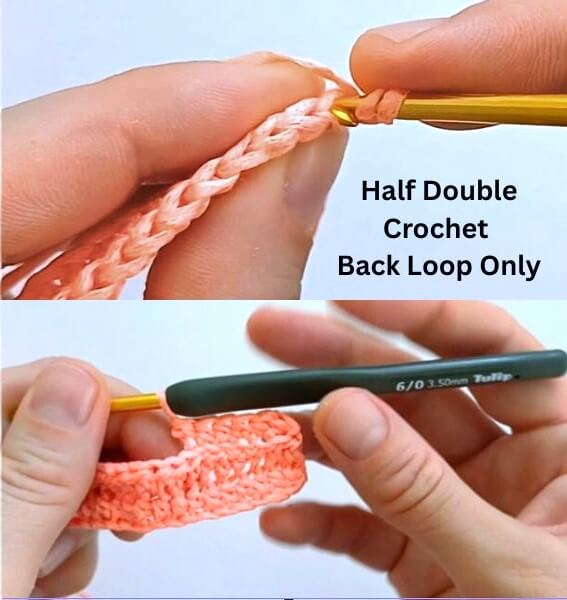
Row 2 and On: Half Double Crochet into Back Loop Only Chain one and turn. Now, crochet half double crochets into the back loop only of each stitch. This creates the ribbed texture that gives the pumpkin a cozy, dimensional look. Ribbing is a popular technique in crochet for adding texture and flexibility.
1. After chain-20, chain 1 and turn the work. Half double crochet in the back loop only staritng fron 2nd chain from the hook.
2. Maintain 3:1 proportion (in cm or inches)
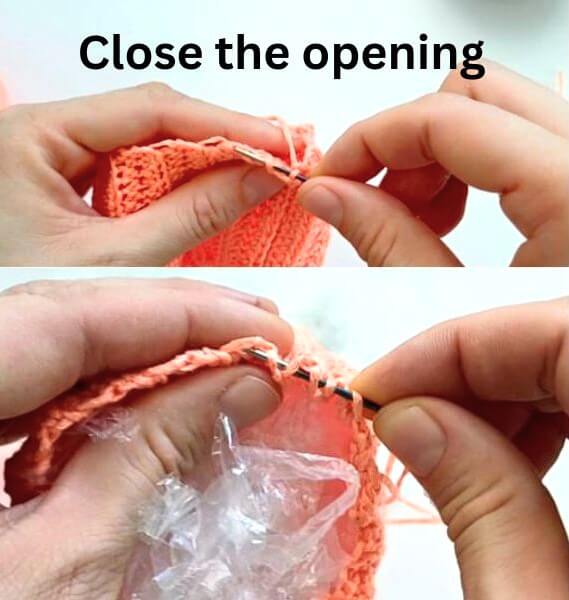
3. Collect stitches on 1 side, stuff, close the other opening.
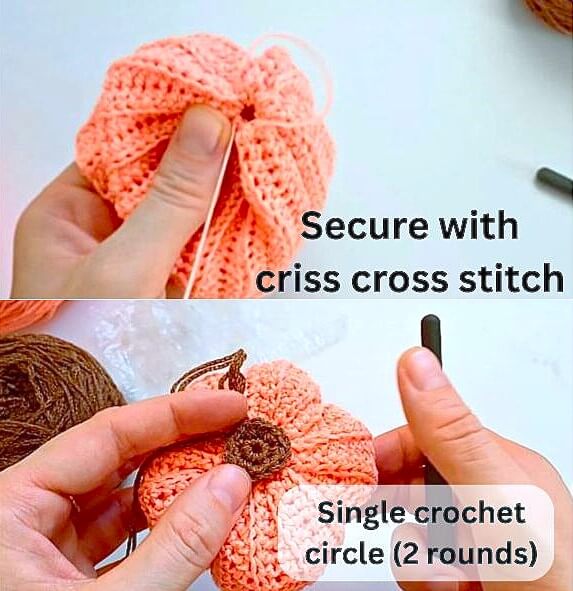
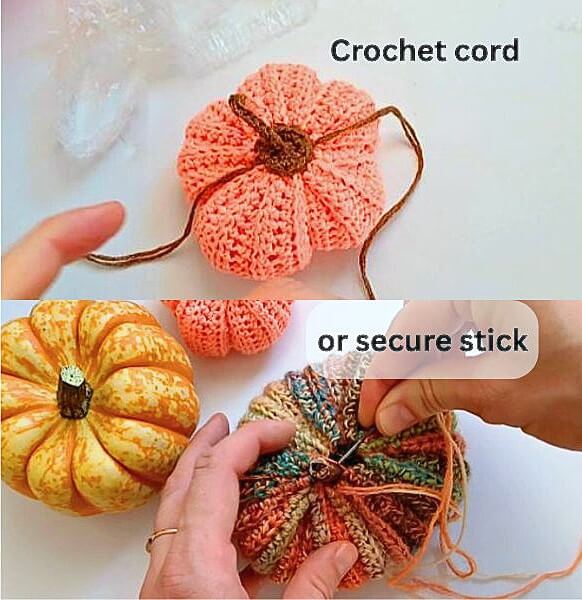
4. Stem. Tighten up hole with criss cross stitches. Crochet 2 rounds single circle (6 sc in the magic ring, 12 sc next round, cut the yarn, sew in place)
5. Crochet simple cord, attach to the circle. Or, if you want - place stick and seruce it tightly.
Tips for Success
Adjust the starting chain length to make your pumpkin wider or narrower.
Use different yarn weights and hook sizes to create pumpkins of various sizes and textures.
Remember the key “one simple trick” is working in the back loops to create the ribbing texture.
Simple Pumpkin for Fall Décor
This easy crochet pumpkin is perfect for autumn decorations, Thanksgiving centerpieces, or a handmade gift. Its flexible pattern suits beginners and those who want a quick, satisfying crochet project.