
Last updated on May 28th, 2026 at 10:40 am
Learn how to crochet a unique Nautilus Seashell Keychain with this step-by-step amigurumi tutorial. This pattern is inspired by organic sea life crochet and is perfect for makers who enjoy intentional, slow-knitting-style precision in their crochet work.
For a visual walkthrough of my “crochet ninja tricks” for joining and shaping, watch the full YouTube tutorial below.
Skill Level: Intermediate (Requires knowledge of Magic Ring, BLO (Back Loop Only), and joining separate pieces).
Finished Size: Approximately 9–10 cm (3.5–4 inches) using raffia or paper yarn.
Design Note: The BLO technique is used throughout to create a realistic ribbed texture that mimics a natural seashell.
Materials Needed
Yarn: Raffia yarn or Worsted weight cotton (approx. 20-30 yards).
Crochet Hook: 4.00 mm (US G-6).
Notions: Yarn needle, sharp scissors, and keychain hardware.
Abbreviations (US Terms)
MR: Magic Ring
R: Rows
Rnd: Rounds
ch: Chain
sl st: Slip stitch
sc: Single crochet
dc: Double crochet
BLO: Back Loop Only (Insert hook into the back loop only to create ridges).
st(s): Stitch(es)
[ ]: Total stitch count at the end of the row.
Pattern Instructions
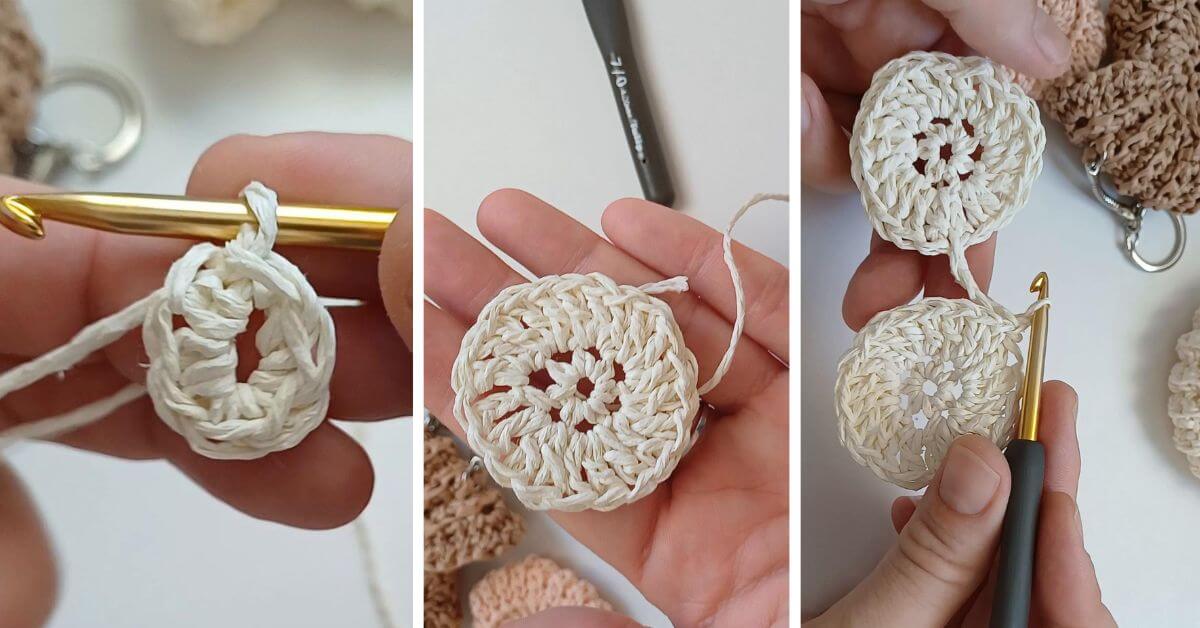
1. Seashell Base (Make 2 Circles)
Rnd1: 6 sc into a Magic Ring. Join with a sl st to the first sc. [6]
Rnd2: Ch 3 (counts as 1 dc). 3 dc in the same stitch. Work 3 dc in each of the next 5 sts, then 2 dc in the very last stitch. [21]
Finishing Circle 1: Fasten off using an invisible Join and weave in ends.
Finishing Circle 2: Do not cut the yarn. Perform the Invisible Join using the tail, but keep your working loop active to begin the Joining & Shaping section.
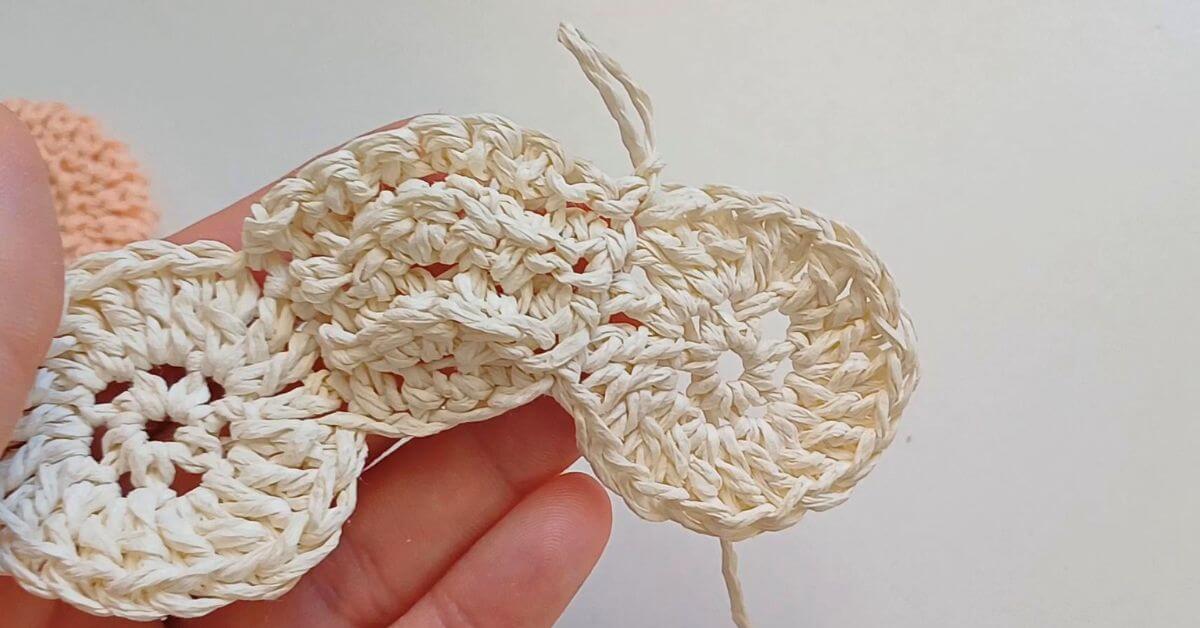
2. Joining & Shaping the Spiral
This section transforms two flat circles into a 3D spiral. We will work in back-and-forth rows while anchoring the spiral to the circles.
Setup: Place both circles with Right Sides (RS) facing out.
Joining Row: Ch 3, sl st into any stitch on Circle 1, ch 1, turn.
The Spiral Rows (Work in BLO for texture)
R1: 3 sc, sl st into Circle 1, ch 1, turn. [3]
R2 (Increase): BLO sl st, 3 sc in the next st, sl st into circle, ch 1, turn. [5]
R3: BLO sl st, 3 sc, sl st, sl st into circle, ch 1, turn. [5]
R4 (Increase): BLO sl st, 1 sc, 3 sc in the next st, 1 sc, sl st into circle, ch 1, turn. [7]
R5–25: BLO sl st, 5 sc, sl st into circle, ch 1, turn. [7]
R26 (Increase): BLO sl st, 2 sc, 3 sc in the next st, 2 sc, sl st into circle, ch 1, turn. [9]
R27–37: BLO sl st, 7 sc, sl st into circle, ch 1, turn. [9]
R38 (Increase): BLO sl st, 3 sc, 3 sc in the next st, 3 sc, sl st into circle, ch 1, turn. [11]
R39–42: BLO sl st, 9 sc, sl st into circle, ch 1, turn. [11]
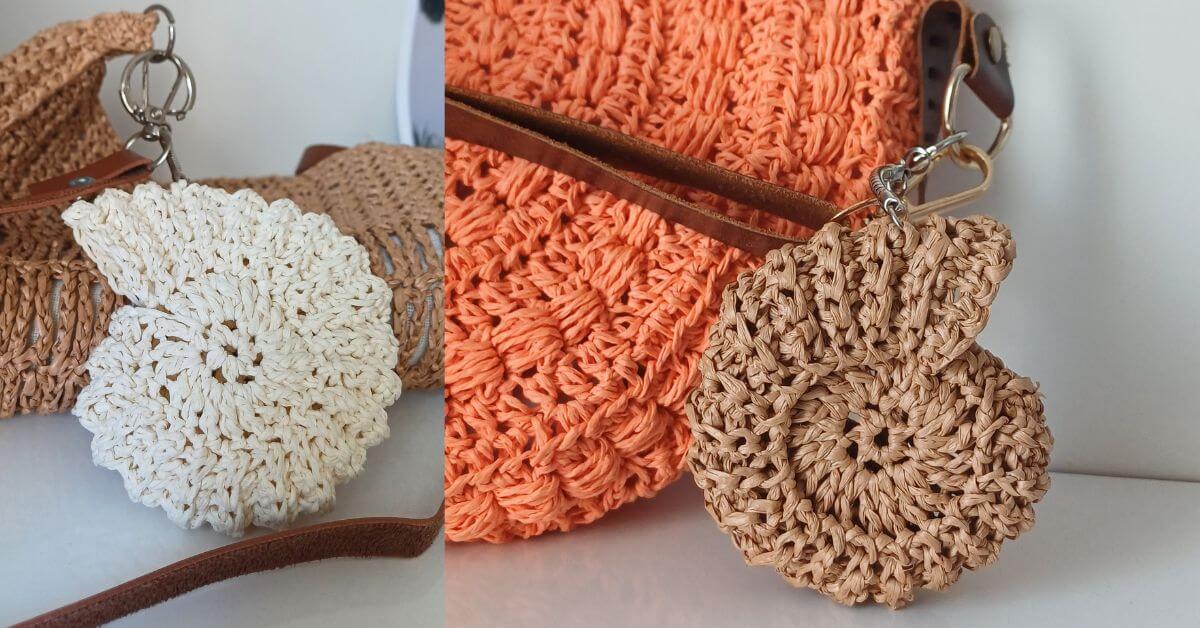
3. Finishing Touches
Fastening Off: Once you finish R42, cut the yarn leaving a 20 cm (8 inch) tail.
Adding the Keychain:
Attach the ring through the top center of the seashell (the widest part of the spiral).
Conclusion
You’ve done it! Your Nautilus Seashell Keychain is complete. I hope you enjoyed bringing this little piece of the ocean to life.
You might like: