
Last updated on June 28th, 2026 at 09:39 am
Hooked on crochet? Fall in love with irresistible crochet bag. This pattern is absolutely free, YouTube video included!
Challenge yourself with working 2 rows simultaneously using advanced crochet stitch. Elevate your skills to a new level, perfect for beginners seeking a challenge!
Crochet Summer Bag. What’s Needed?
Bag’s size
Rectangle base: 12.6×2 inches (32×5 cm)
Height: 13.4 inches (34 cm)
Width: 12.6 inches (32 cm)
Disclosure. Dear readers, some links on this blog are affiliate links. This means, when you use these links to make a purchase, I may earn a small commission at no extra cost to you. These commissions, earned through the Amazon Affiliate Program, play an important role in sustaining this blog.
You will need:
- 8 3/4 oz (250g) paper raffia
- H-8 (5mm) crochet hook or similar to adjust the gauge
- Ready bag strap
- 2 bag strap rings
- Darning needle
- Sewing needle
- 1 stitch marker
Lining (Optional)
- Lining fabric (2 pieces 14.17 by 13.39 inches [36 by 34 cm])
- Sewing thread in the lining color
- Sewing machine
Gauge (tension)
14 sts and 18 rows per 4in (10cm) in single (double) crochet stitch using H-8 (5mm) crochet hook.
Other notes.
- Yarn quantities are based on average requirements and are approximate.
- US terminology with UK terminology given in round brackets ( ) afterwards.
Abbreviations
cm centimeters
g grams
in inches
mm millimeters
ch chain (chain)
PM place marker
rep – repeat
sc (dc) – single crochet (double crochet)
dc (tr) – double crochet (treble crochet)
sl st (sl st) – slip stitch (slip stitch)
st/s – stitche/s
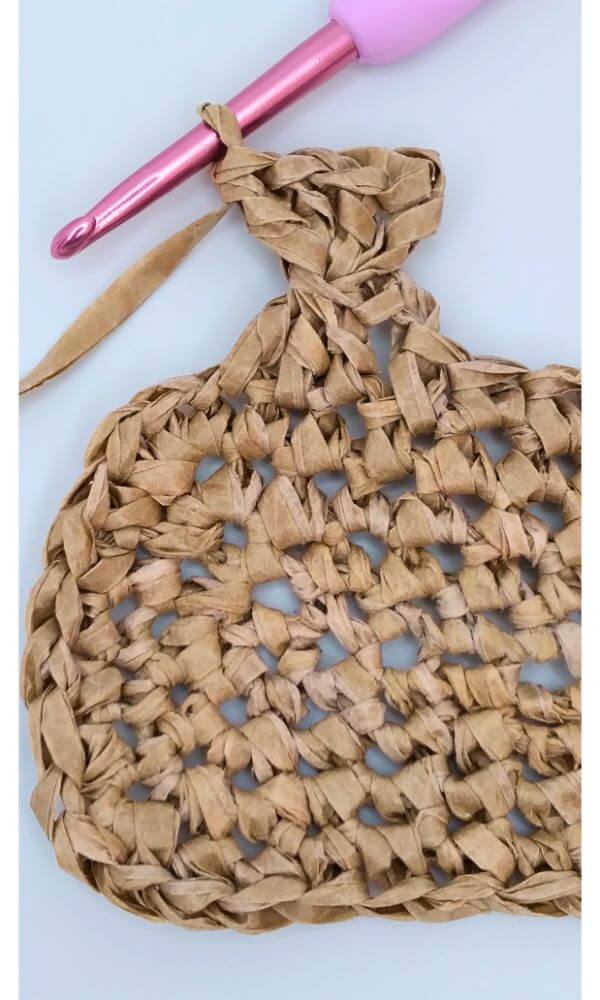
Crochet bag base
Crochet bag’s base is made from single crochet (dc) rectangle.
Starting chain
Chain 39 sc (dc);
Rectangle base
Round 1.
Put crochet hook in the 2nd loop from the hook, crochet 37 sc (dc), 3 sc in the last chain, 37 sc (dc) back on the other side of the chain, 3 sc (dc) in the skipped 1st loop. PM on the last st (80 stitches)
Round 2.
37 sc, 3 sc in the same stitch, 1 sc, 3 sc in the same stitch, 37 sc, 3 sc in the same stitch, 1 sc, remove marker,3 sc in the same st. PM on the last st. (88 stitches)
Round 3.
38 sc, 3 sc in the same stitch, 3 sc, 3 sc in the same stitch, 39 sc, 3 sc in the same stitch, 3 sc, 3 sc in the same stitch, remove marker, 1 sc, PM on the last st. (96 stitches)
Round 4.
39 sc, 3 sc in the same stitch, 5 sc, 3 sc in the same stitch, 41 sc, 3 sc in the same stitch, 5 sc, 3 sc in the same stitch, 2 sc, PM (104 stitches)
Round 5.
40 sc, 3 sc in the same stitch, 7 sc, 3 sc in the same stitch, 43 sc, 3 sc in the same stitch, 7 sc, 3 sc in the same stitch, 3 sc, remove marker. (112 stitches)
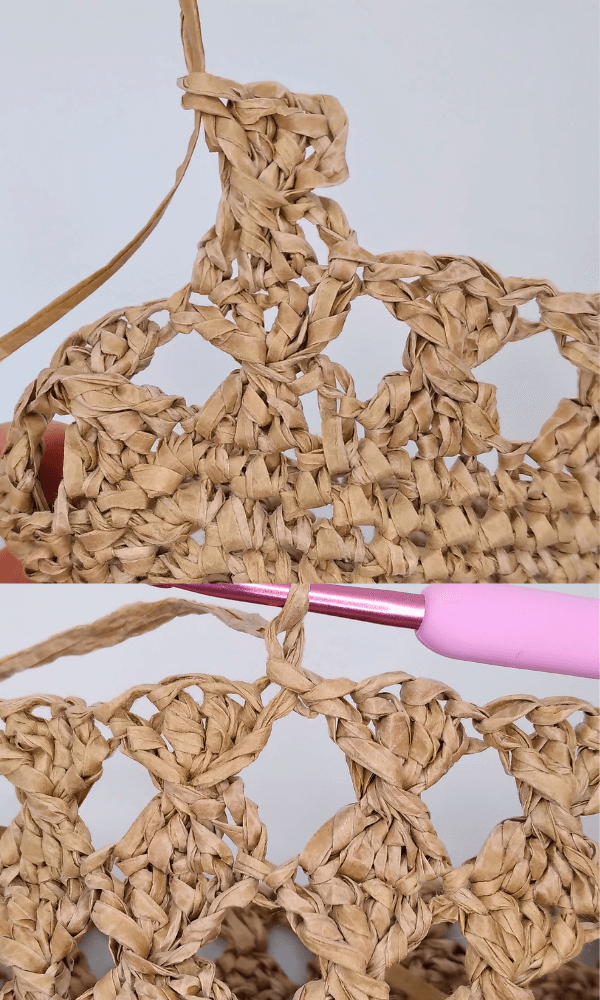
Bag’s Body
The bag’s body will consist of 12 rounds in total. Each crochet stitch element measures 4 stitches in width and comprises incomplete double crochet stitches (tr).
Tip. Here is a short video on how to make incomplete double crochet stitch on Pinterest! Or, YouTube short video!
Consequently, there will be a total of 28 elements in each round.
Round 1. Advanced crochet element:
- ch 1, 3 incomplete dc (tr). You will have 4 loops on the hook, YO, pull through all 4 loops on the hook
- ch 3 (counts as first dc (tr)), *YO, insert crochet hook in the intersection under 4 loops we just pulled through, YO, draw a loop and finish regular double crochet (tr)*, repeat from ** 2 more times.
The rest of crochet elements as follows:
YO 3 times, 4 incomplete double crochet (tr) – 7 loops on the hook. YO, pull through first 5 loops on the hook, YO, pull over 2 loops, YO, pull over 2 loops. (This is regular dc on the top of the element).
Make 3 more dc (tr) by inserting the hook into the intersection (this time under 5 loops).
Repeat this 26 more times. At the end of the round sl st in the top ch-3 in the 1st element.
Round 2-12. The same as round 1, except first element where we chain 3:
- ch 3, 3 incomplete dc (tr). You will have 4 loops on the hook, YO, pull through all 4 loops on the hook.
- ch 3 (counts as first dc (tr)), *YO, insert crochet hook in the intersection under 4 loops we just pulled through, YO, draw a loop and finish regular double crochet (tr)*, repeat from ** 2 more times.
- YO 3 times, 4 incomplete double crochet (tr) – 7 loops on the hook. YO, pull through first 5 loops on the hook, YO, pull over 2 loops, YO, pull over 2 loops. (This is regular dc on the top of the element). Make 3 more dc (tr) by inserting the hook into the intersection (this time under 5 loops).
- Repeat this 26 more times. At the end of the round sl st in the top ch-3 in the 1st element.
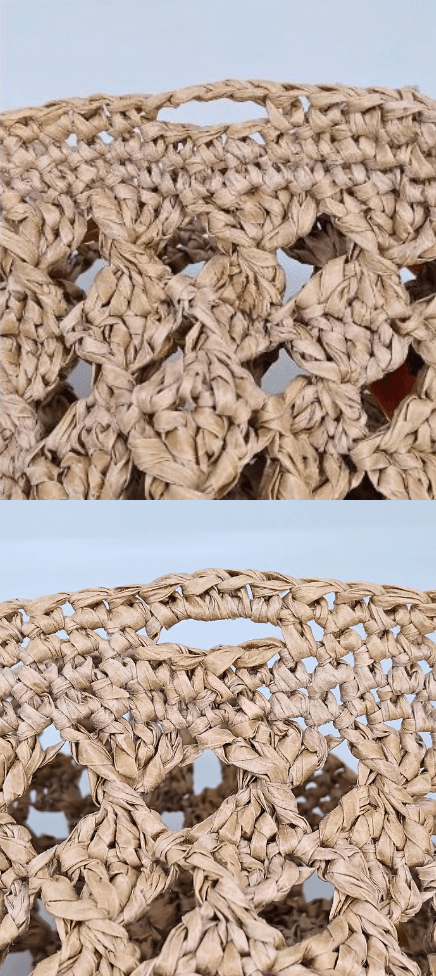
Top part
The top part where we attach straps is single crochet rounds. After we finish the last element of the main body:
Round 1-2. ch 1 (don’t count as st), 112 sc, sl st in st sc.
Round 3. Locate the sides of the bag. There should be 52 stitches between. On the sides chain 4, 52 sc, ch 4, 52 sc, sl st to join in the round.
Round 4. ch1 (don’t count as st), 112 sc, sl st to join. (4 sc in ch 4 space of the previous round included)
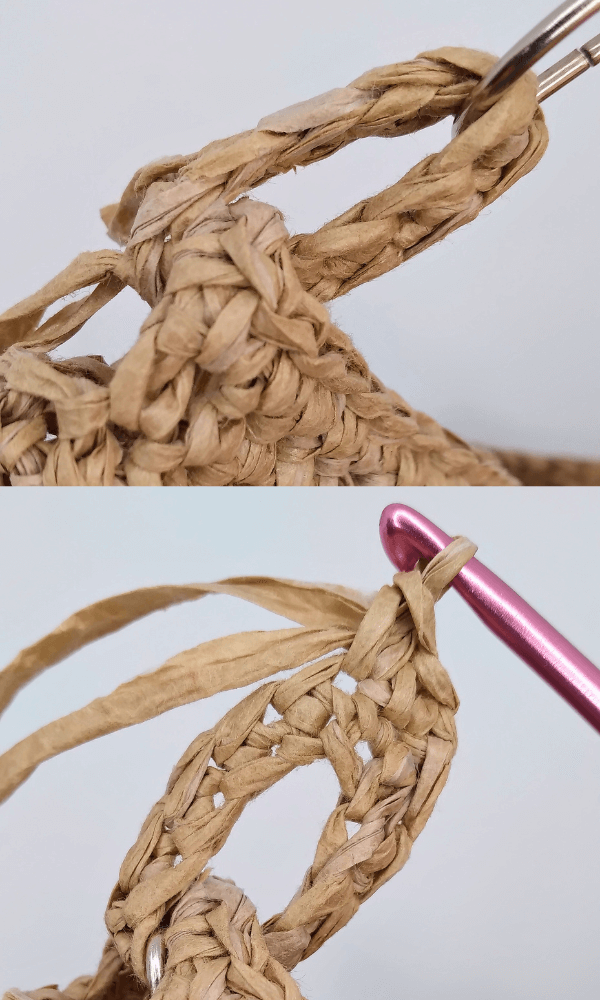
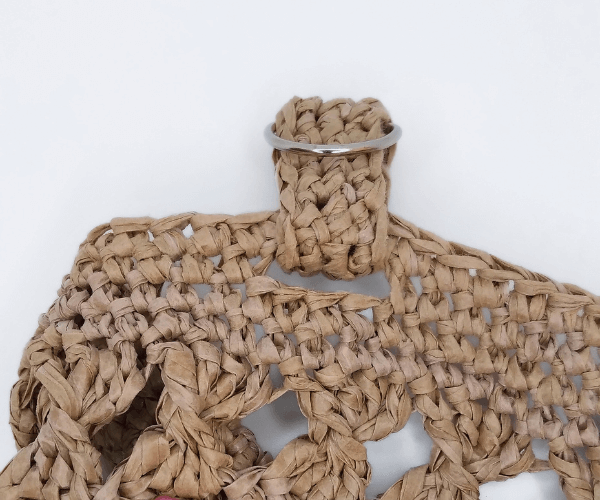
Loops for metal rings
ch 10, place the metal ring through and attach to the strap hole, sl st to join in the round
*ch1 (don’t count as st), 10 sc, sl st in 1st sc*, repeat from ** 2 more rounds
Cut and hide yarn tail.

Lining
I want to take a moment to talk about the optional lining. While adding a lining to your crochet bag can provide some extra durability and structure, I understand that not everyone may prefer it.
I have a video tutorial about the lining process on my YouTube channel to keep my blog post concise. If you want to learn how to enhance your crochet bag project, go to the 35:35 mark in the video and join me.
Remember, crochet is all about customization and making something uniquely yours.
Conclusion and other tutorials
I hope you had as much fun making it as I did sharing this tutorial with you.
Adding a lining or not, your bag is bound to become a stunning addition to your summer wardrobe.
But guess what? The crochet journey doesn’t end here! Go to my blog for more creative crochet bag tutorials that fit different styles.
So, grab your hook and yarn, and let’s continue this crochet adventure together!
How to Crochet a Summer Raffia Bag
Thank you for joining me, and I can’t wait to see you in the next tutorial.
Happy crocheting! xxx