Last updated on December 27th, 2025 at 11:10 am
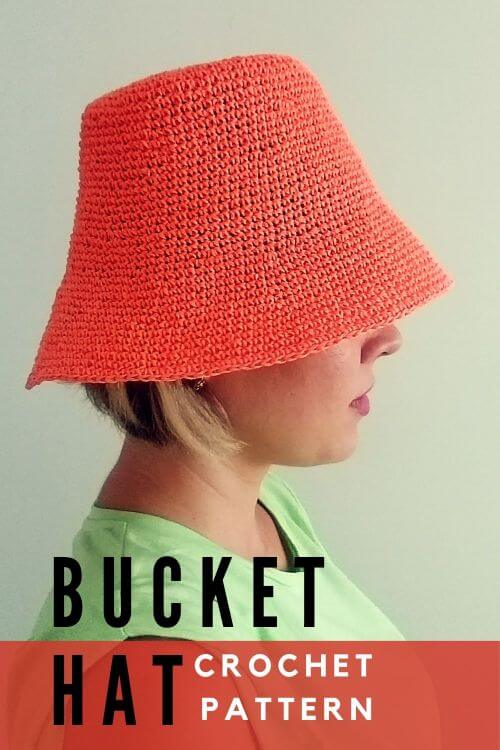
Crochet bucket hat pattern – absolutely free and beginner-friendly as we are using only basic crochet stitches.
I was never into hats, but looking on Pinterest I came across beautiful crochet hat and made similar.
Ideal company with this half circle bag!
Abbreviations
US terms
sc – single crochet
sl st – slip stitch
Rnd- round
inc – increase
Easy, beginner friendly and chic. You can use any yarn, but preferably raffia or paper yarn. I used paper raffia – it is sturdier. Following this guide you will get the right shape from the beginning using any yarn.
This tutorial is made for an adult size: 55-57 cm.
Materials
Yarn: Paper yarn, Raffia (Raphia). 200-250 meters. Usually one 200 gram skein is enough.
Other yarn choice: Use lightweight, breathable fibers such as cotton, bamboo, linen, or raffia. These materials keep the hat cool, comfortable, and suitable for hot weather, while also providing some sun protection.
Crochet hook size 3.5mm (E4) or smaller size to attain the gauge.
Stitch marker
Gauge (10x10cm): approx.16 stitches, 16 rows in single crochet.
Weight: 177 grams. Around 215 meters of paper yarn.Working in a spiral rounds. To keep track of beginning of the row, place marker on the first stitch and move marker to the first stitch of each round
Crochet Hat Parts

Crochet Bucket Hat YouTube Tutorial
Different yarn or gauge? Easy to follow and understand the principles of getting the hat’s shape just right with any kind of yarn and gauge.
Crochet Hat Written Pattern for Ladies
Flat top (diameter 12 cm)
- Rnd 1: 6sc into a magic ring. Place marker on the first stitch of each round.
- Rnd 2: inc around (2 sc in each stitch)–12 sts.
- Rnd 3: *1 inc, 1 sc; work from * 6 times–18 sts.
- Rnd 4: *1 inc, 2sc; work from * 6 times–24sts.
- Rnd 5: *1 inc, 3sc; work from *6 times–30 sts.
- Rnd 6: *1 inc, 4sc; work from * 6 times–36 sts.
- Rnd 7: *1 inc, 5sc; work from * 6 times–42sts.
- Rnd 8: *1 inc, 6sc; work from * 6 times–48 sts.
- Rnd 9: *1 inc, 7sc; work from * 6 times–54 sts.
- Rnd 10: *1 inc, 8sc; work from * 6 times–60 sts.
Crown (height 10cm, Circumference around 56 cm)
- Rnd 11: *1 inc, 9 sc; work from * 6 times–66 sts.
- Rnd 12: *1 inc, 10 sc; work from * 6 times–72 sts.
- Rnd 13-15: sc around without increases.–72 sts.
- Rnd 16: *1 inc, 11sc; work from * 6 times–78 sts.
- Rnd 17-18: sc around without increases.–78 sts.
- Rnd 19: *1 inc, 12sc; work from * 6 times–84 sts.
- Rnd 20-23: sc around without increasing–84 sts.
- Rnd 24: *1 inc, 13sc; work from * 6 times–90sts.
- Rnd 25-26: sc around without increasing–90 sts.
Brim (Width–7 cm, Circumference around 79 cm)
- Rnd 27: *1 inc, 14sc; work from * 6 times–96 sts.
- Rnd 28: *1 inc, 15sc; work from * 6 times–102 sts.
- Rnd 29: *1 inc, 16sc; work from * 6 times–108 sts.
- Rnd 30: *1 inc, 17sc; work from * 6 times–114 sts.
- Rnd 31- 33: sc around without increases -114 sts.
- Rnd 34: *1 inc, 18sc; work from * 6 times–120 sts.
- Rnd 35-36: sc around without increasing – 120 sts.
- Rnd 37: *1 inc, 19sc; work from * 6 times–128 sts.
- Rnd 38: sc around with no increases–128 sts. (Stiffen the edge by adding triple folded working yarn or cord to the row)
Finish by making 3 slip stitches (even out the edge). Fasten off and weave in ends.
How to make crochet increases invisible?
As you see from the written pattern, we increase each round by 6 stitches. Do not make an increase on the same spot where the previous one.
Iron each part not over 150 degrees. Test on the swatch before ironing.
You might like:
Perfect Granny Square Tutorial
2-square crochet slippers (no heel turn!)
How to Stiffen Crochet Hat
Iron steam paper or raffia
I used simple steam iron and after finishing each part I worked over with the steam.
In my case, it was enough because of tight crochet. Steaming evens out texture and gives desired shape.
Fabric stiffener
Ready solution you can buy in craft shops. Suitable for various fabrics. Use according to instructions.
PVA Glue
How to make PVA mixture.
Mix PVA glue with water in proportions 1: 1. Soak the cloth in the solution, shape and dry. If the fabric is not stiff enough, you can apply the PVA solution again with a brush and wait until it dries.
Starch for cotton yarn
Starch can strengthen and stiffen cotton yarn. For the solution, take half a liter of water, bring to a boil and add 2 tablespoons of starch.
After solution is ready, apply evenly on the hat. Define the desired shape and let it dry.
Warning! Be careful using this method on the white, over time starch can turn yellowish.
Conclusion
I am sure you enjoyed crochet bucket hat pattern. Crochet hat is not difficult.
Once you try one, you will want to make more and more hats. Crochet raffia is not as pleasant as wool or cotton, but the result is worth it.
If you compare both instructions, you can see how increases are distributed and you should easily adjust the pattern the way you need!
Select what gauge is close to offered ones and start crochet your lady’s hat today!